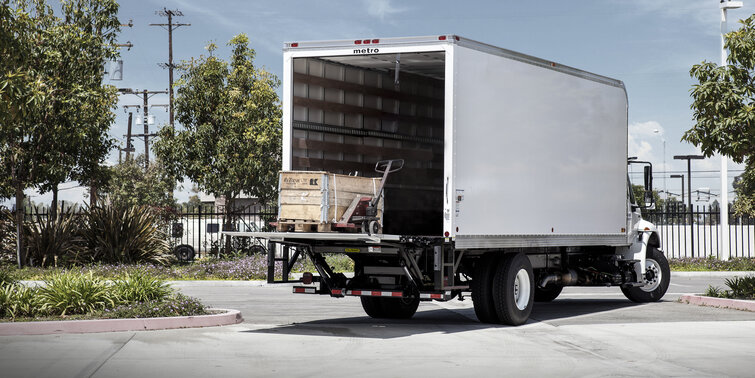
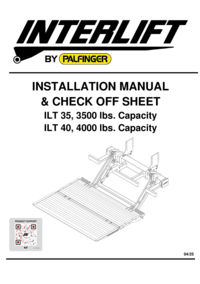
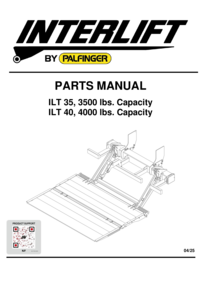
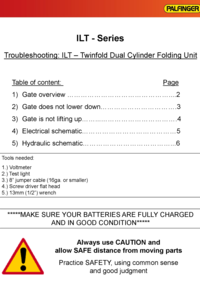
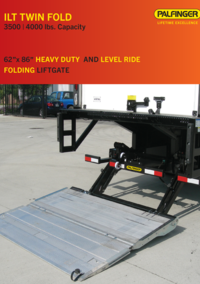
ILT
ILT Product Support
PALFINGER has built a reputation as a market leader in technical support and lifetime product service. This also rings true with the ILT liftgate. Whether you need help through our service network or our dedicated Technical Service Team, PALFINGER will ensure your equipment stays up and running. PALFINGER products feature heavy-duty, hardened and corrosion-protected pins with low-maintenance greaseable bushings. The power packs are equipped with thermo-switch-protected motors and extra heavy-duty solenoids.

PRODUCT SPECIFIC TROUBLESHOOTING
Keeping your equipment up and on the road is priority number one. When using our troubleshooting guide with assistance from our dedicated technical service team, you can feel confident that your liftgate will be repaired correctly and in a timely fashion.
NOTE: Always use a digital voltmeter when checking voltage to determine if you have sufficient power to operate the liftgate.
Before troubleshooting, please ensure that the battery voltage is above 12.5 Volts, that all batteries have been load tested, and that connections are cleaned and connected correctly.
The next quick check is to perform a 10 -10 test.
10-10 Test: Check battery voltage 10-10 test using a multimeter set on DC voltage: open the liftgate and raise it to bed level. Attach negative voltmeter lead to the negative post on the motor. Attach the positive voltmeter lead to the positive post on the motor. Activate the raise switch to the deadhead motor. Keep the switch activated for 10 seconds. The voltmeter should read 10 volts or more after 10 seconds. If you have less than 8 volts, the batteries are low. Charge batteries and retest. If the results are the same, do the batteries need to be replaced? Do you have clean, corrosion-free connections? Is the circuit grounded properly?
Once the test has passed, jump both big posts on the motor solenoid to see if the motor runs. If the motor runs and the liftgate lifts, this is good and means all hydraulic valves and components are working correctly. If the liftgate tilts, the hoses are backward. Next, please make sure that all electrical components are in good working order, like circuit breakers at battery connections and fuses at batteries and the circuit board.
Gate is not lowering down
One or both release valves on lift cylinders are not opening up
▶Normally closed valves to prevent lowering gate in case of a failure
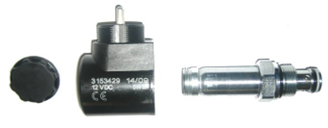
- Check coils for resistance
- Voltmeter shows 5.5 to 7.0 Ω ▶ Coil is good
- Voltmeter shows 0 Ω ▶ Coil is shorted out
- Voltmeter shows Overload ▶ Coil is destroyed by burn or physical damage
LIFTGATE IS NOT LOWERING
Check Battery Power
- Check if the cab switch is ON
- Check the resettable circuit breaker on top of the batteries
▶ Push the reset tab back in; if popped out
- Check the fuse at the pump and motor (qty 1) inside the main tube on the passenger side behind the rubber cover
- Start the truck and run the engine in a fast idle to charge the battery
▶ If the liftgate starts working, recharge the batteries
▶ Test batteries and truck/trailer charging system
- Check for a solid ground connection from the motor post to the main frame of the liftgate
Check Controls
- Visually check the valves at the cylinders for mechanical damage—bent or broken?
- Open up the rubber cover on the passenger side to get access to the hydraulic power unit, unscrew the hex head bolt to slide out the power unit and unplug the red cable #2 with the inline fuse
- Unplug cable #6 to both 2 wire release valve harnesses
- Connect female end #2 and male end #6 to energize release valves
- Gate lowering down
▶ Check switch and grey 3 wire harness to switch for damaged spots
- Gate is not lowering down
▶ Check both release valve wires for damaged spots
▶ Unscrew plugs of valves—stick the voltmeter or test light into connectors and hit the down function—each valve at a time
- See light or read voltage—cable is ok
- See no light or 0 V — damaged wire
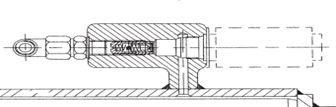
▶ Remove the plastic cap of the release valves—keep the coil in place—and hold a screwdriver close to the steel valve stem while hitting the down function
- The screwdriver did not get magnetically pulled towards valve steam; bad coil
LIFTGATE DOES NOT LIFT UP
Check Battery Power
- Check if the cab switch is ON
- Check the resettable circuit breaker on top of the batteries
▶ Push the reset tab back in; if popped out
- Check the fuse at the pump and motor (qty 1) inside the main tube on the passenger side behind the rubber cover
- Start the truck and run the engine in a fast idle to charge the battery
▶ If the liftgate starts working, recharge the batteries
▶ Test batteries and truck/trailer charging system
- Check for a solid ground connection from the motor post to the main frame of the liftgate
LIFTGATE DOES NOT LIFT UP—POWER DOWN ONLY
Check Voltage at the S5 Shift Valve at the Pump
Once Voltage checked at S5 Shift valve at pump, Remove coil on S5 and remove valve
stem and check for debris on stem, Clean stem with brake clean and shop air then slide coil
over stem of valve, disconnect outer solenoid wire so motor will not engage while valve stem
removed and check that you can see valve working while removed when you work controls
up and down if valve not responding must replace S5 valve
Check Controls
- Check the valves at the cylinders visually for mechanical damage—bent or broken?
- Open up rubber cover on passenger side to get access to the hydraulic power unit, unscrew the hex head bolt to slide out the power unit and unplug red cable #2 with the inline fuse
- Jump female end #2 to small positive connector (switch cable #5 attached) on motor solenoid
⚠WARNING—Do not stay between platform and truck body—gate will raise up⚠
- Gate is raising up
▶ Check switch and grey 3 wire harness to switch for damaged spots
- Gate is not raising up
▶ Check motor solenoid for proper function—hear clicking?
- No clicking—motor solenoid or thermo switch at motor is bad
- Hear clicking—check for coltage on both big positive studs to ground
▶ Have voltage—solenoid is ok
▶ No voltage—solenoid is not connecting internally—bad solenoid
▶ Motor solenoid is ok
- Check for power on large positive motor stud
▶ Have power—bad motor or bad brishes
▶ No power at motor stud—check connection to solenoid

Product Videos
ILT